Saturday, July 31, 2010

Disappearing Nine Patch is Quilted!!!!!

So, the Figgy Pudding Disappearing Nine Patch is finally completely quilted.


I was almost done doing the pebble quilting with about 3 inches left around each end when I ran out of threat.  So, I bought a cone of the metalic thread from Superior Thread to finish the job since I had already gone through 4 500 yard spools.  Well, even with the spool on a thread stand, I just could not get the tension right and was getting extremely frustrated, so I put the quilt aside for a little while.  I went back to it about a month and a half later and still had the same issues no mater what I did (changed top tension, needles, bobbin tension, speed, etc.).  So aside it went again for another month.

Today, I found another spool of metalic thread instead of the cone and decided to give it another go.  Well, that was it and I was able to finish quilting the fab quilt tonight.  I'm in love with it.  I'm so happy with how it came out.  I still need to add a binding and trim the threads, but I'm so happy that this step is over.

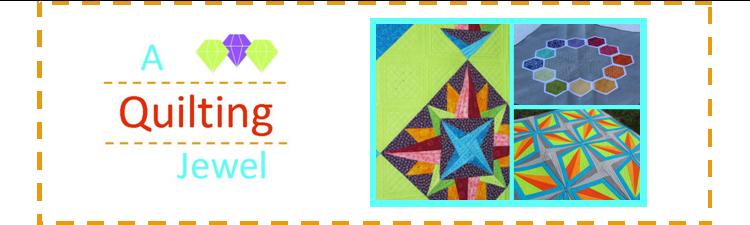
Here are a few more pics of the quilting.


Sunday, July 25, 2010

Radiant Star BOM - Block 2

I finished the second block of Carol Doak's Radiant Star BOM tonight.  Unfortunately, the block ended up finishing 1/2" larger than it was supposed to.  I'm not quite sure how that happened since I printed it out the same way that I always print off my paper pieced patterns, but it looks like I'll have to re-do this one.  I'm not too devastated that I have to re-do it since I'm not crazy about the dark red on the outside.  I think next time I'm going to put the baby blue on the outside and the brown on the inside.

And here are both the blocks together.  I'm not that crazy about the second block since it's not very star like and is more flower like in my opinion.  You can see the size difference in the photo too.

And I leave you with a cute picture of the new kitten that we have officially named Misty.

Tuesday, July 20, 2010

Your Quilting Tips

Warning, this is a long (but useful in my opinion) post.  In my recent giveaway I had asked everyone to comment on their best quilting tip.  I have compiled those quilting tips into this post.  I tried putting them into some categories, but the general category ended up being the biggest.  I hope you find the tips useful. 

General: 
  •  Take a break if things arent going your way, it will only get worse if you don't
  • Always keep your rotary cutter in the closed position. Learn that from the start, and no accidents will happen. A very good habit for a new (and old) quilter
  • Use the same ruler for all the cutting on one quilt. The markings can be ever so slightly off as to cause distortion in the final measurements.
  • Measure as you sew. If you are making a complicated block, measure each component as you make them to make sure your block will end up the intended size. It is easier to fix an error early than to rip apart a whole block.
  • Keep a lint roller or blue painters tape handy. I love whisking up all those tiny fiber pieces from my work area.
  • If you don't wash your yardage (never wash pre-cuts or they distort horribly) but do wash the quilt after it's finished use one or two Shout Color Catcher's in the washing machine to catch any colors that might run and ruin your finished quilt. 
  • "have a go"! I used to look at amazing quilts and think "No, I couldn't do that" but I've found bit by bit that if I have a go, I can do more than I think.
  • Always buy a little bit of extra fabric in case you make a mistake while cutting. -Renee G
  • Keep a stilletto handy. This great tool is the best for keeping your pieces straight and aligned as you feed them thru the machine.
  • If you starch one piece of fabric for your block, be sure and starch them all. Sometimes the starch can tighten up the weave on a fabric an leave it looking pulled if the others aren't starched. - Scottylover
  • There are usually multiple techniques to accomplish the same look, so research and try new ways of doing things. You'll find one or more that work for you.
  • keep a small cutting mat near my sewing machine so that I don't have to get up and walk to wherever the big one is when I need to trim something like a log cabin block.
  • Shop hardware. I use a telescoping magnet to pick up pins and more. I did toss all the pins that did not respond to the magnet. This can be found in the tool section of Lowe's, Home Depot, etc. Another hardware gadget is to get a door peephole to view your work. It puts distance between you without the need to walk away.  If color is a challenge, add an artist's color wheel to your arsenal of goodies.
  • Use a soft eyeglass case to store your rotary cutter.
  • I lower my ironing board to the height of the table where I'm sewing. That way, once I've sewn my seams and am ready to press my fabric blocks, then I merely turn my chair to the side, place the fabric on the lowered ironing board and press. No getting up and going across the room - a true timesaver.
    And here is another one - I know I have to get up from my sewing periodically to stretch and move around...so I use my old-fashioned CD player and once a CD finishes playing, it shuts off. I always have to put the CD player across the room, because I've learned I'm a 'rebel' and if it's near me, I don't get up which is the entire point of playing the CDs. Anyway, I get up, walk across the room, stretch, get something fresh to drink, walk around a few minutes, then put a new CD in, and go back to sewing. By doing this, I am reminding myself to walk away from my sewing for a much-needed break.
  • Make a commitment to quilt every day, even if it is just a few minutes. It is amazing how quickly the little bits add up to a quilt.
  •  Clip those threads as you go - I hate doing it all at once.
  • My favorite tip is to cut all the fabric first before sewing. It makes everything go a lot smoother!
  • I purposely place my ironing board away from the sewing area so I am forced to exercise as I go to use it.
  •  Make your iron your best friend and press everything!
  • This fabulous tip comes from Lois Hallock, author of “Creating Your Perfect Quilting Space”.
    To get the best folded stash and maximize the space available on a shelf for your fabric, use an 8 1/2" wide acrylic ruler to fold fabrics that are half-a-yard and larger. When you wrap your fabric around the width of the ruler and then fold the piece in half, the size of your folded fabric will be the same width as a fabric bolt; which will allow you to see more of the print when you look at it on the shelf. Magically, the piece is also flatter so you can stack more fabrics than with any other folding method.
    For fat quarters and quarter-yard pieces, use a 4 1/2" wide acrylic ruler to wrap the fabric around, again folding the wrapped fabric in half.
  • I love using a Magnetic wand to pick up all the pins... it's not sewing; but, it helps clean things up fast 
  • Have an empty (decorative) kleenex box next to your recliner (easy chair) to put all the cuttings and threads into. I can't sit at the sewing machine for long stretches and sit in my comfy chair to cut apart chain piecing, threads, trimmings, etc. And, if the box turns over bits do not fall out. When full, throw it away. I've done the same thing with wipes containers, etc.
  • Leftover batting scraps are great for dusting, especially around the sewing area. It picks up all the threads and lint and little pieces of fabric!
  • Want your ruler to stay in place while you cut, but don't want those stupid emery dots that don't really work anyway? Use some rubber cement! It's clear, provides residue free friction, AND peels off cleanly when it gets a little too grungy/thread-ridden.
  • My favorite quilting tip is to clean my sewing machine every Sunday night - take out the bobbin, remove all the dust and stuff, dot of oil and put in a new needle. 
  • I'm allergic to tape and adhesives, espec the blue painters tape. So instead I use vinyl cling "stickers" to mark my measuremtns on my rulers, or 1/4 " guide on my sewing machine. They have no adhesive. You know the type, you get them in your upper left corner of your windshield of your car when you get an oil change, or sometimes nonprofits send them to you during the annual fundraising drive. The one I use on my machine to guide my 1/4" is from a Cuisinart pan I received for my birthday. 
  • Being Scottish, my favorite quilting tip is to use the cloth from worn-out clothing to cut into quilting squares, sort by color, then make up a 'family' quilt for the couch with the clothing 'memories'. I give these to the kids on special occasions.
Preparation:
  • Cut all the pieces on one day and then starting the quilt. Love to have "kits" ready to go when I have the time to sew.
  • When I buy fabric and a pattern I like to package them together so when I'm ready to sew I have all the pieces together. 
  • Measure twice cut once.
  • Have several bobbins wound so you don't have to stop to wind a new one. Same with hand quilting, have several needles threaded.
  • Get your quarter of a inch correct... it will save all the frustrations. And it's sweet when it matches up just right.  
  • Remember to press seams and blocks and not to iron them. Love Mary Ellen's Best Press to give blocks additional stiffness.
  • Measure a qtr inch from your needle on your machine and place a piece of blue painters tape on the line all the way to the front of your machine. This helps to keep your fabric straight and guide it through the machine as you sew, so your qtr inch is exact. Works great!
  • Remembering to change your needle and using a good machine quilting needle and a nice smooth thin thread like Aurifil 50 wt. to achieve accurate 1/4" seams!
  • Save your scraps!
  • I recently created a quilt binding calculator that takes all the guesswork in figuring out how much fabric you'll need to create straight grain binding for a quilt.. just punch in a few numbers and it'll spit out all the info you need to create your binding! Of course, I want to share it with everyone so here's a link... http://www.wambers-whimsies.blogspot.com. There's a link to it on my left sidebar.
  • Read the pattern several times before cutting and sewing!
  • Leave all your hand stitching projects ready to go by the back door so you always have something to do when waiting (doctor's office etc.).
  • I snip the corners of my fabric before I wash it, IF I wash it. It helps to keep it from fraying. 

Applique:
  • Applique using fusible interfacing to get the effect of needle turn applique without actually having to do it. A tutorial can be found here: http://summeratgrandmashouse.blogspot.com/2009/07/circles.html
  • Elmer's glue! I love using it to baste applique, and bindings for machine sewing. Just use a very fine line of glue and then hit it with the iron to dry out the glue. It's washable and non toxic.
  • When working with fusible applique, take a minute to put freezer paper down on your ironing board. Really helps to protect your ironing board from potential residue from the fusible.
Quilting:
  • When quilting your quilt, bring the bobbin thread to the top of the quilt when you start then all the clipping of threads are all on the top, not on both sides. 
  • Great tip I have learned while blogging is to use "leaders and enders" while chain piecing. Little bits of fabric that you piece in between the chain piecing. This way you get 2 quilts at the same time! More info can be found here: http://www.quiltville.com/leadersenders.shtml 
  • My tip would be to square up your blocks. Everything goes so well together when they're all the same size.
  • Learn the "quilt as you go" method - it makes quilting on my little machine so much easier!
  • make sure you press your seams in opposite directions so when you join them they nestle together and then you will more than likely have a block that is straight....
  • My favorite tip is to pin, pin and pin some more. It has made a big difference on my piecing.  
  • Use yellow dishwashing gloves to move the fabric when machine quilting.
  • Press seams to the darker side.
  • When I quilt, I use safety pins that have a prebent arm to baste with.
  • When hand quilting and you get blood on the quilt, dap a little spit to remove it right away. I know, it sound grouse but it will stain if you don't and it's going in the wash once done.
  • I use pet grooming gloves when I quilt -- much cheaper than "official" quilting gloves, and they pick up cat hair, too! Oh, and I don't actually wear them -- I lay them on top of the sandwich and use them for traction; otherwise there's too much putting them on and taking them off.
  • My favorite tip is to use painters or masking tape to make straight quilting lines. It's so much faster than marking everything out with a pencil!
  • I like to remind myself to relax and stay calm while stippling. I sometimes start to get stiff and tense and that is when my difficulties with my machine quilting begin. Also, if I am having troubles with any part of quilting, I like to just take a little (or big) break, walk away and come back later. 
  • Use lots of basting pins for your quilt sandwich and quilting gloves to avoid puckers on your quilt back.

Phew.... there are a lot of tips there.  Thank you everyone for providing such a comprehensive list of tips.  If you have any additional ones that aren't listed here, feel free to list them in the comments section.

Sunday, July 18, 2010

Designer Mystery BOM - Block Two

Well, I'm enjoying the last day of my vacation right now after a week off of work.  My in-laws came up from Georgia to stay with us for a week, so there hasn't been much sewing going on lately.  I did, however, manage to make the second block from the Fat Quarter Shop's Designer Mystery BOM today after they left to stay with more family this afternoon.


Isn't this santa hat cute?  I think it's adorable.  I'm really loving these blocks.  I can't wait for the next one.    This is going to be such a great quilt.

I've got a busy week ahead of me with work, but hopefully I'll be able to get some more sewing in soon.  I'd like to begin working on machine quilting one of my many unfinished tops soon. 

Saturday, July 10, 2010

Winners of Giveaway

First, I'd like to thank everyone for commenting.  I've discovered some great new blogs from some amazing quilters.  Everyone provided some great quilting tips.  I'll post a bunch of them coming up.

Now for what you're all waiting for.  The winners.

The winner of the first fat quarter bundle is: Peaceful Piecer who said, "I guess leader enders are my best tip .... once I got the hang of it I use this all the time."


The winner of the second fat quarter bundle is: MoeWest who said, "This fabulous tip comes from Lois Hallock, author of “Creating Your Perfect Quilting Space”.
To get the best folded stash and maximize the space available on a shelf for your fabric, use an 8 1/2" wide acrylic ruler to fold fabrics that are half-a-yard and larger. When you wrap your fabric around the width of the ruler and then fold the piece in half, the size of your folded fabric will be the same width as a fabric bolt; which will allow you to see more of the print when you look at it on the shelf. Magically, the piece is also flatter so you can stack more fabrics than with any other folding method.
For fat quarters and quarter-yard pieces, use a 4 1/2" wide acrylic ruler to wrap the fabric around, again folding the wrapped fabric in half."

And finally, the winner of the layer cake is: Lisa who said, "So many good tips have already been given! I would say remembering to change your needle and using a good machine quilting needle and a nice smooth thin thread like Aurifil 50 wt. to achieve accurate 1/4" seams!"


Congrats to all of the winners.  Please email me your mailing address so that I can send out your prizes.  Email me at jensorenson05 at gmail dot com.  

Thursday, July 8, 2010

And Another Fiesta! Block

I made another Fiesta! block, bringing the total up to 6 for this particular block.  Just two more to make and I can move onto another type of block for the Fiesta! quilt.


In other news, we got a new kitten on Sunday.  She's 6 weeks old and is getting along great with our other cat, Bentley.
We still don't have a name for her, but are hopefully getting close.  We didn't have a name for Bentley for about three weeks, so I'm sure once we think of the right name we'll know it.
Finally, don't forget about my giveaway.  It ends tomorrow, so if you haven't already entered, make sure you do so before the end of the day tomorrow.

Friday, July 2, 2010

100th Post Giveaway

As I mentioned earlier, I would like to hold a giveaway for my 100th post.  I'm a bit delayed as I had ordered 2 layercakes, one for myself and one to giveaway, but only one arrived.  It took two weeks for the shop to finally respond to me and ship out the missing, but paid, for layercake.

This past year and a half blogging has been a fantastic time.  I've become so inspired from everyone else in the blog world.  It's fantastic.  I also have enjoyed all of the support I've received on all of my projects.  I truly appreciate all of the kind words that everyone has shared with me since I started blogging.

Without further adieu, here's the giveaway...

I will be giving away 2 fat quarter bundles and a layer cake.  The giveaway will be open until next Friday, July 9th.

Giveaway 1: A fat quarter bundle with more traditional fabric

Giveaway 2: Another fat quarter bundle


And, the grand prize, giveaway 3: a NEST Layercake by the fabulous Tula Pink.

Here are the rules - You may enter up to 3 times, but you must post separate comments in order to have your entries counted multiple times.

The ways you can enter:
1. Post a comment on this blog about your favorite quilting tip.
2. Follow this blog and tell me about it.
3. Blog and about this contest and post a link to where you blogged about it in the comments.

The giveaway will be open until next Friday, July 9th.  I will announce the winners next weekend.

Good luck!